This tutorial will show you how to access an article for editing and explain the various elements which make up the article editing view.
The content in a Joomla website is created as articles. Each article can contain a mixture of copy, images including slideshows, video and with the correct styling, pull quotes.
Articles are grouped together using categories which enables them to be divided into manageable groups. For example a photographic website might have categories for colour and monochrome photography.
All of the existing main copy on your website is contained within articles. These can be accessed by left-clicking the Article Manager option in the Content menu shown on the left-side of the control panel, or, by cleft-clicking the Edit Articles (Site Pages) button displayed in the Web Site Admin menu centre of the control panel as shown below.

Using either option will result in a list of all articles within your website being displayed as in the following example.
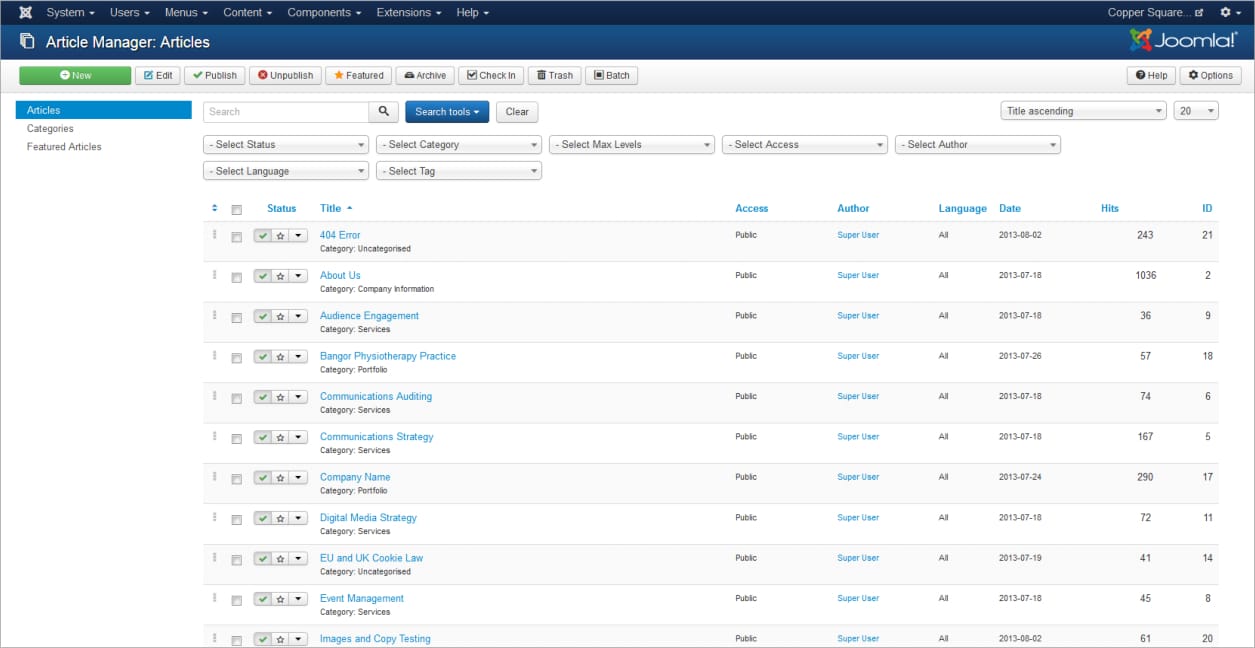
The Article Manager view shows a list of articles within your website. The list shows the following information (left to right):
- Status : whether the article is published (a tick) or unpublished (an ‘x’)
- Title/ Category: displayed under the article title
- Access: normally Public for everyone to view but Joomla enables you to create content which only specific users can view after logging in.
- Author: author name
- Language: normally All
- Date: date the article was created
- Hits: number of times the article has been viewed
- ID: a unique identifying number applied to the article by the Joomla system when created
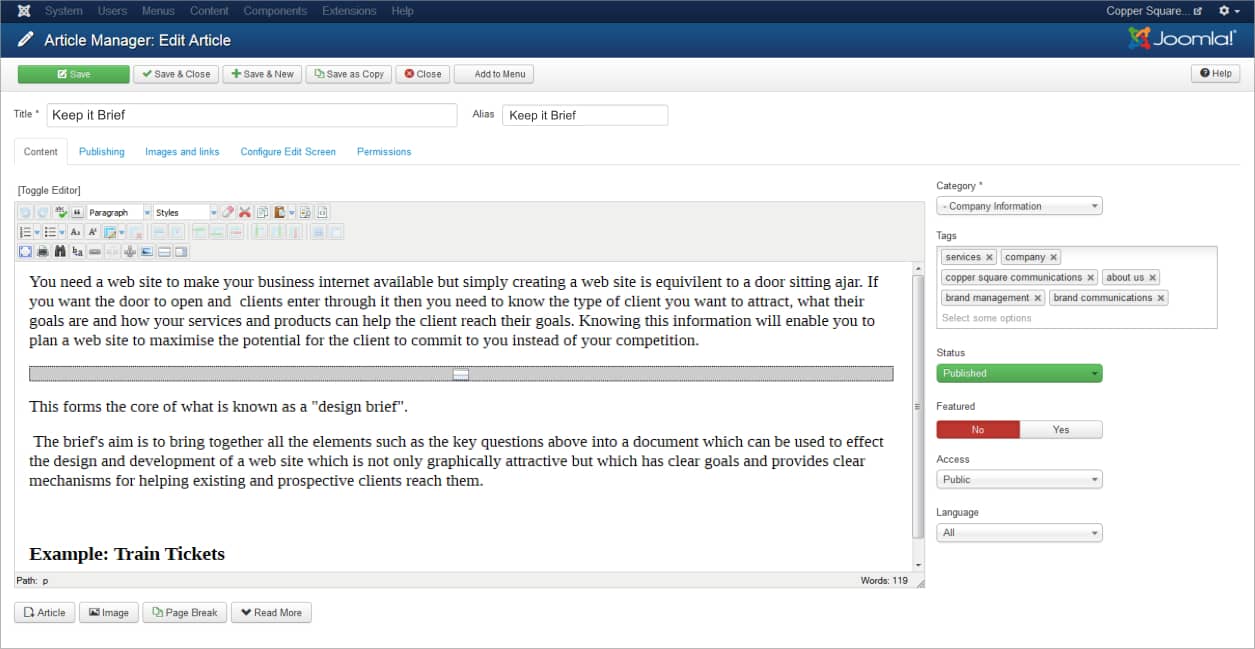
To begin editing an article, left-click it’s title. This will open the article for editing as in the following example.
The above is the normal article view. Below is a second version with numbered sections relating to the information which follows.
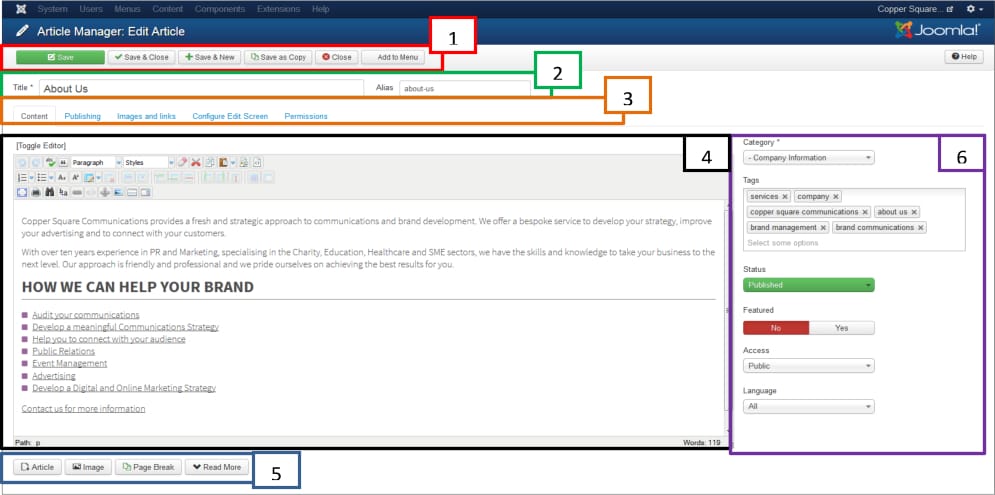
The page can broken down into the following areas.
- Article buttons: used to save, close and make a copy of the article. The last option, Add to Menu, will only appear after the first save has been completed and enables you to attach the document to an existing menu.
- Title and Alias: The title is the text you want to appear as the title of your article when displayed. The alias enables you to provide a more descriptive text for the document which is beneficial for search engines.
- Tabs: These contain various options for the article.
- The main edit window including toolbar of options. More information relating to this element is detailed below.
- Additional article options/ features.
- Article properties: In this area you can select the category to which the article will belong, set tags which are used during searches and for SEO, update the status of the document, whether the article will be featured (given prominence) within the website, who can view the article (normally public for everyone) and the Language which is normally All.
Article Main Edit Features
The main article editor, labelled 4 in the image above, is the heart of the Joomla system in that it is where the majority of the content on a Joomla website is created.
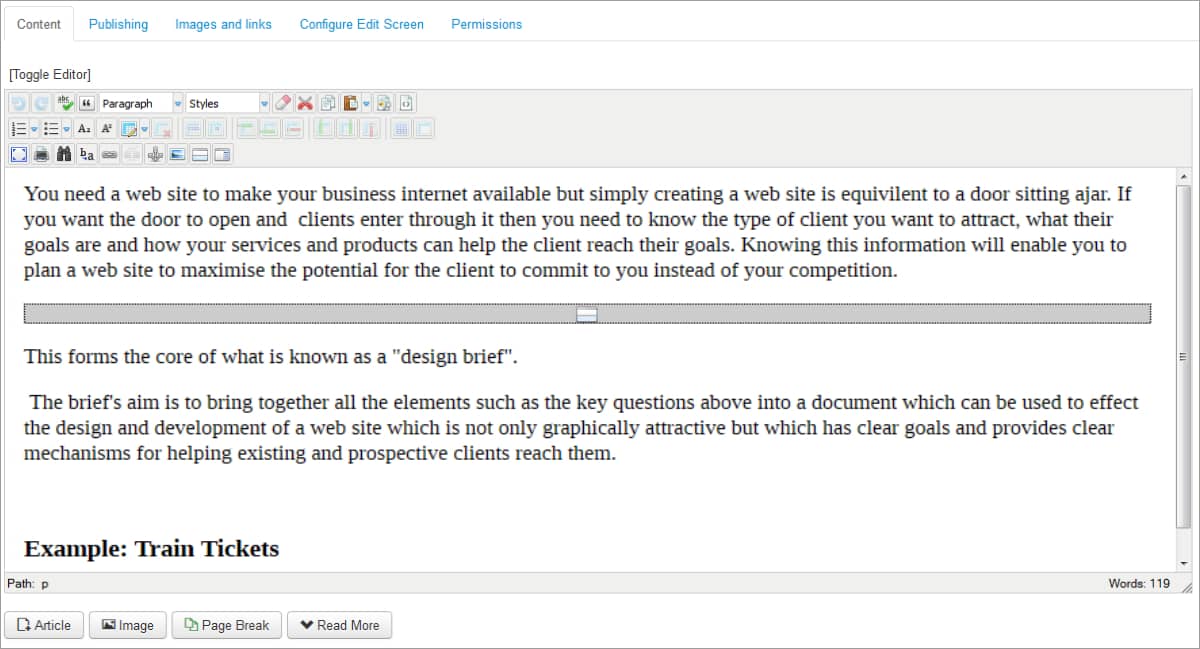
The Editor
This works in a very similar fashion to a document editor like Microsoft Word. You can add new text by left-clicking the location you want to enter the copy, or highlight text you want to replace and begin typing.
Using the toolbar above the main window you can apply styles to the text/copy entered, create bullet lists and add tables. The styles are split into two options, those directly applied to text and those more generally applied. A style guide is normally supplied to help you understand how to use these.
The Toggle Editor link above enables you to hide and reveal the toolbars if required.
Publishing Tab
This panel enables you to set the start and end dates for an article. This would enable articles to be created in advance with a specified date in the future when they are to become active. It is also possible to set an end date for the article when it becomes inactive and no longer viewable on the website.
Images and Links tab
This panel enables you to add the following images:
Intro Image: This image is only shown when the article is displayed in a blog layout where the image may be smaller.
Full Article Image: This image is displayed when the article is viewed as a single page within the website.
There are also tabs labelled Configure Edit Screen and Permissions which are not covered in this tutorial.
Additional Article Options
There are four buttons available in this section.
1. Article
This enables you to embed another article within the one being edited. This can be useful if you have a set text which needs to be displayed on more than one page within the site. Using this facility means you would only have to update the set text once to change all affected articles.
2. Image
Use this button to insert an image directly into the article.
3. Page Break
Page breaks are a useful way to break up a long page of text into more readable sections. If you create Page Breaks you will need to provide a title for each and Joomla will create a menu containing the titles, linked to each section within the article.
4. Read More
This is used when you need to create a small intro text while having a much larger document. If you then display a category of articles which use the read more option, only the small piece of copy above the read more line will be displayed for each. Clicking on the article’s read more button, which is created automatically by Joomla, will then display the full article.
Saving Updates
After you have made the changes to your article, you need to save it to view the changes on the website. Choosing the Save button will apply the changes but keep the article open for further editing. This can be useful if you want to check and then amend an article. If you are not intending to update the article further, you can choose the Save & Close option which will apply the changes, close the article editor and return you to the article manager window.
You can now return to the main administrator control panel by left-clicking the icon top-left of Joomla.
![]()
This ends the tutorial on the Article View & Editor