This is part two of a two part tutorial in which I will show you how to restore a website on CPanel using an Akeeba backup archive. If you have not already done so, you may want to read the first part of this tutorial, Joomla Website Akeeba Restore - Part One, which shows how to prepare a database for the restore process on CPanel.
In this part of the tutorial, I will show you how to upload the required files needed to complete the restore and how to run the restore process using your web browser.
Uploading the Akeeba backup and other files needed to complete the restore
There are three files required to perform an Akeeba backup restore:
- The Akeeba Backup File
- Kickstart.php
- en-GB.kickstart
Kickstart.php is the application used to unpack the Akeeba archive and help walk you through the restore process. You can download the Kickstart.php and en-GB.kickstart files from the Akeeba website Downloads Section.
Locate Akeeba Kickstart in the list of options and select the download button to obtain the most up to date files. Once downloaded you will need to extract the files, right-click and Extract All on Windows, Double-click on archive on OSX.
There are four files in the archive but you only require the two listed above. Copy these to the same folder as your Akeeba backup archive.
The three files need to be uploaded to the ‘www’ folder of your hosting account. You can upload the files using an FTP client such as Filezilla. See our article titled Download Akeeba Backups Using Filezilla.
While this article shows how to configure Filezilla for downloading Akeeba files from the backup folder, you can use the tutorial to configure access to thepublic folder by changing the paths for the Default Local and Default Remote directories as follows:
- Default Local: Path to the folder where your Akeeba Backups and Kickstart Files are stored
- Default Remote: /public_html
When you connect with Filezilla, you will see a screen similar to the following.
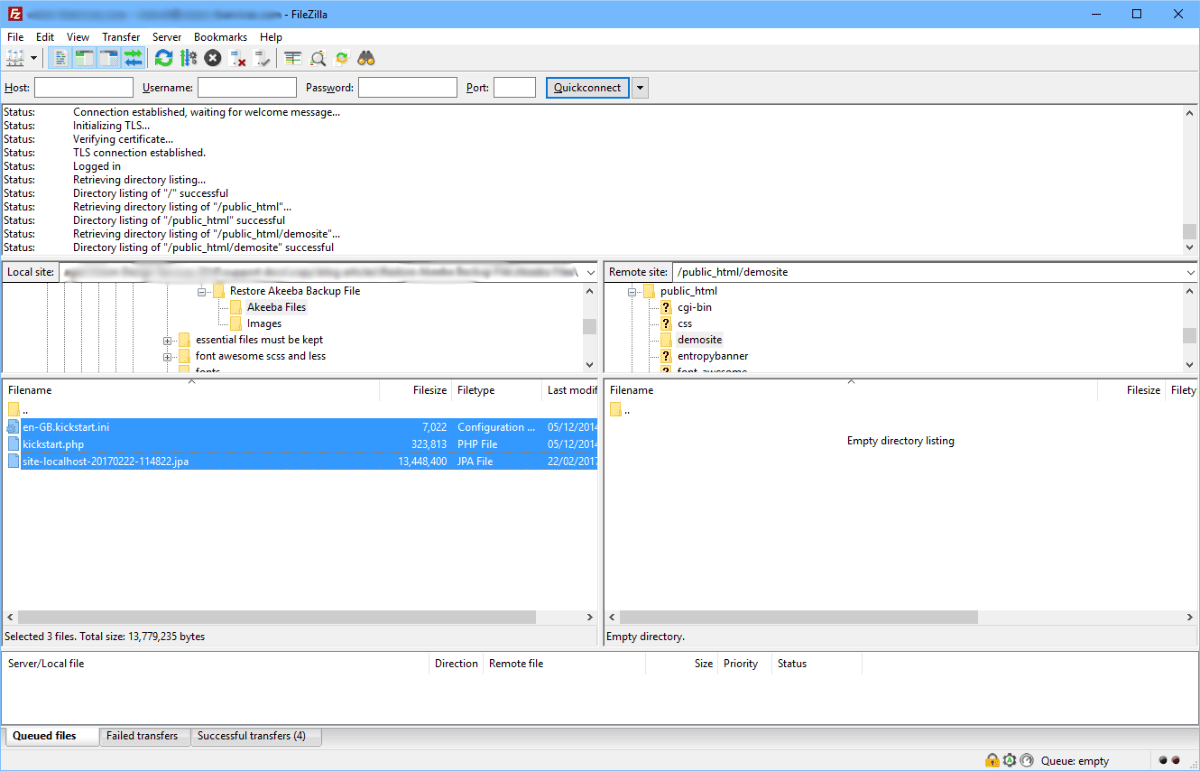
Note: Completing the restore to the root /public_html folder means the Joomla site will be displayed when someone visits your website address. I am completing the restore in a sub-folder as a demo.
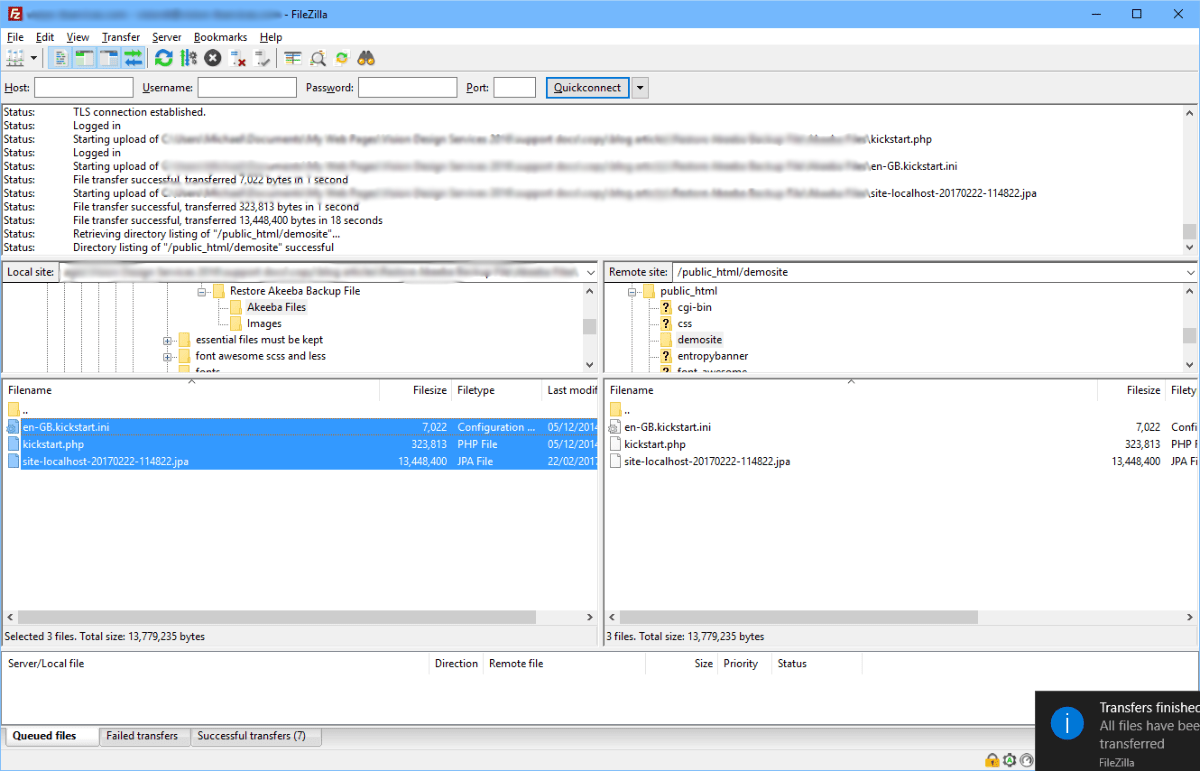
Copy the Akeeba backup archive, Kickstart.php and en-GB.kickstart files to the /public_html folder by highlighting the three files then right-click and Upload. Once done the three files should show in the right hand window as in the image below.
This concludes uploading the files required to complete the restore. The next stage will show how to initiate the restore to recreate the website.
Running The Kickstart Web Application
You will need the database name, user name and password created following Part One of this tutorial, or, the details if you already have a database prepared.
Open your web browser and enter your full website address followed by ‘/kickstart.php’. This should cause the following screen to be displayed.
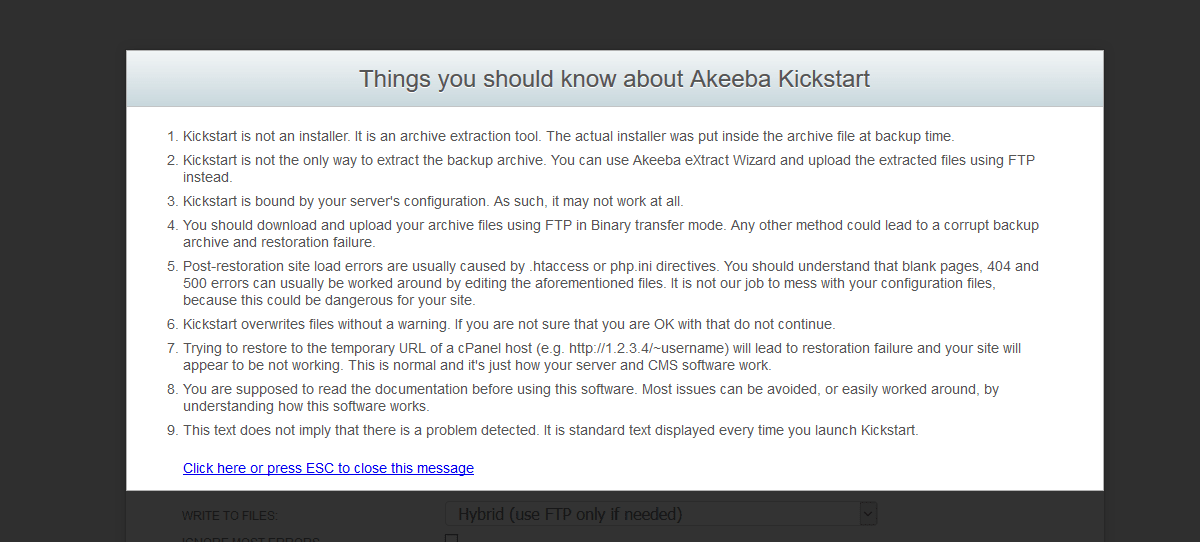
Follow the instruction to remove the message shown then Select the Start button, bottom of the displayed window. This will start the unpacking of the Akeeba archive to recreate all the folders and files required for Joomla.
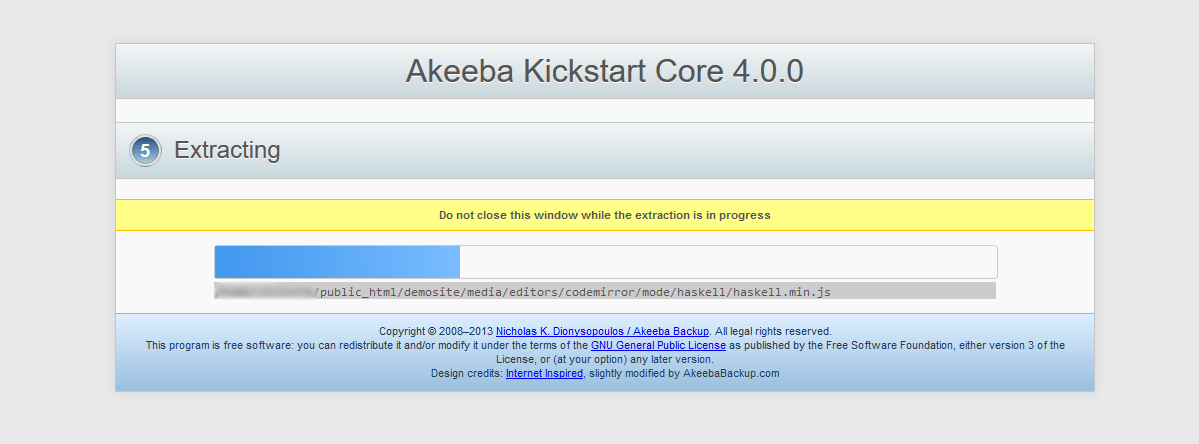
Once completed the window will change to the following.
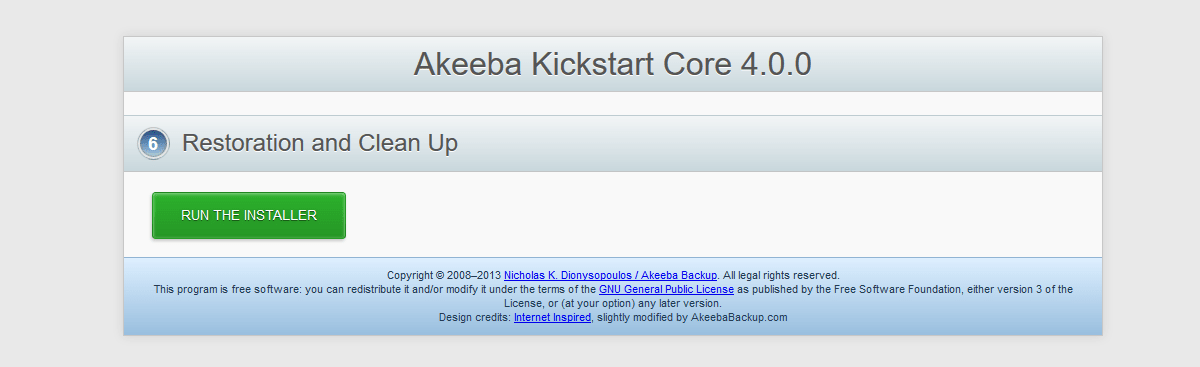
Select 'Run The Installer' to begin the restore process. The following screen will be displayed.
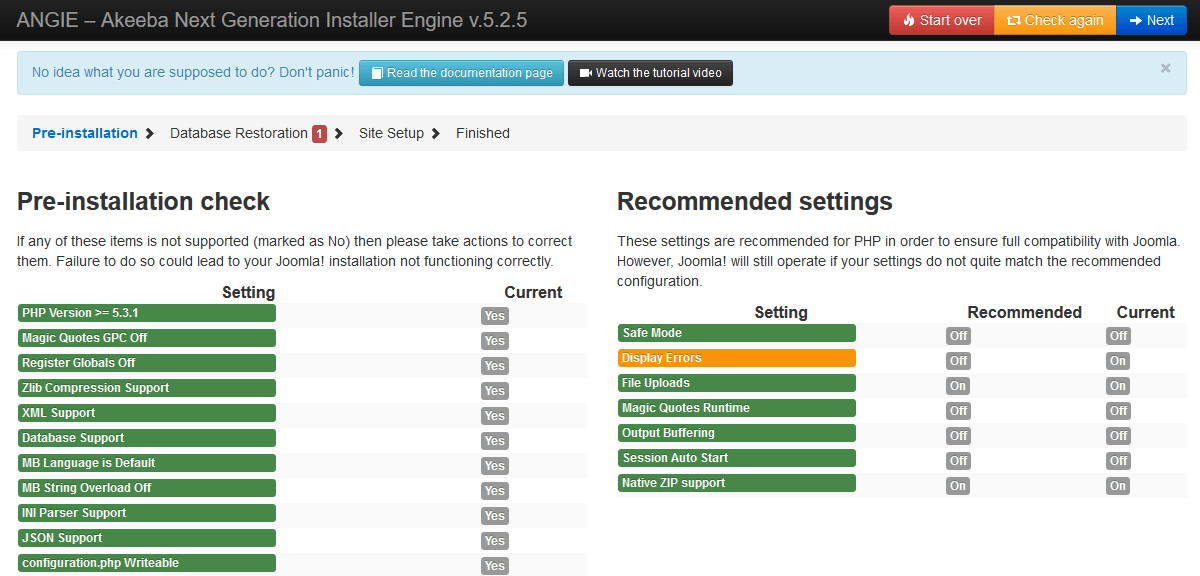
Ideally you want all of the options under Pre-installation check and Recommended settings to be green. In the screen grab Display Errors is highlighted as ‘ON’ but this does not cause any issues with the restore and Joomla function. Select the ‘Next’ button.
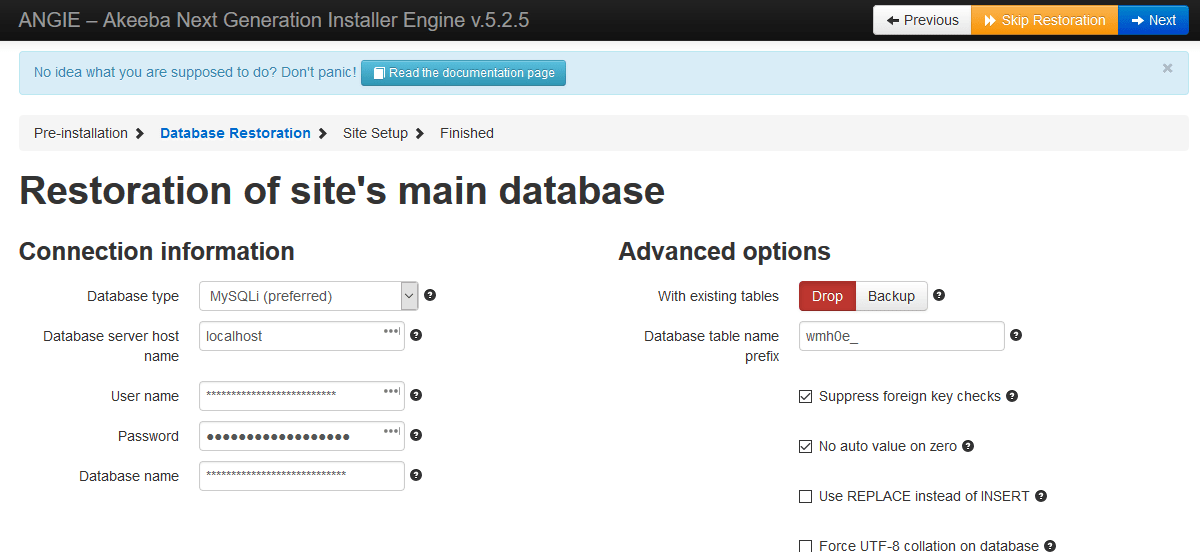
Top-left of this window are the settings for the database and these should be completed as follows:
- Database server host name: localhost
- User name: user created previously with access to the database
- Password: password created for the user
- Database name: name of the database created earlier
Right of these settings is the option concerning what to do with any existing tables. If this is a new database, or, you are not concerned about the existing tables, leave this set to ‘Drop’ then left-click next to restore the database. A warning like the following will be displayed.
Select 'OK' to proceed with the database restore. A progress bar will be displayed while the restore is happening. If successful the following window will be displayed.
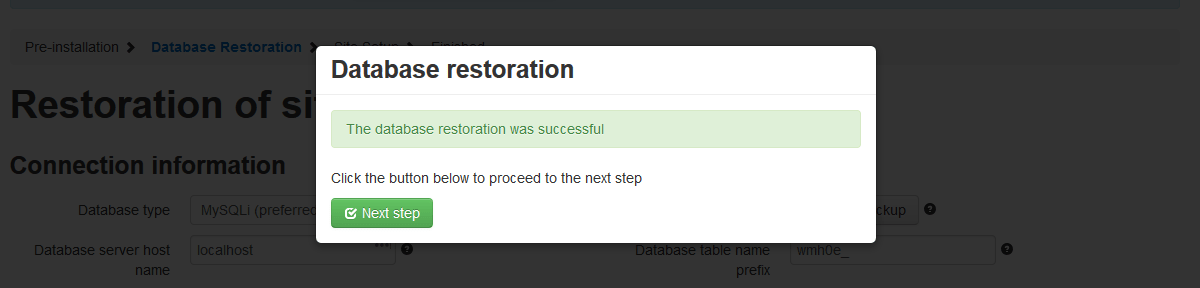
Select 'Next Step' to display the Site Parameters window.
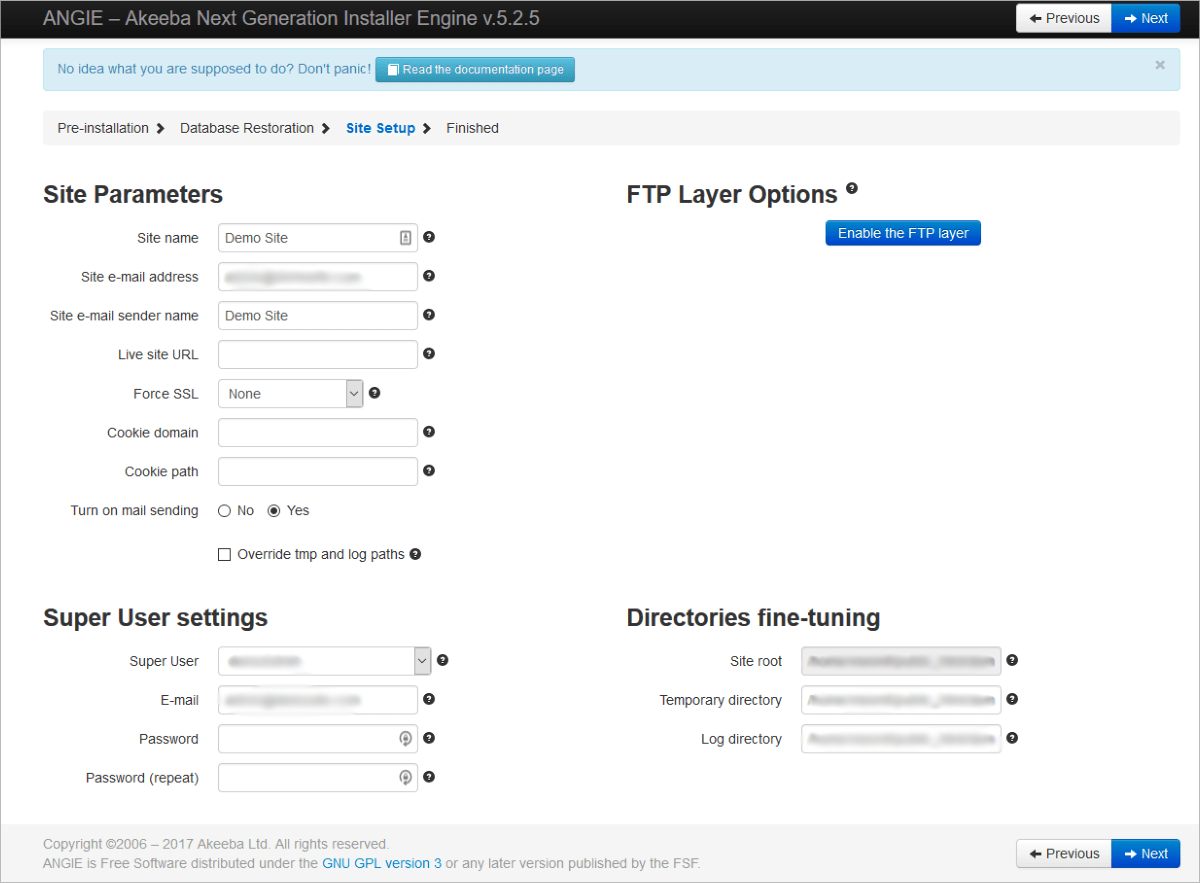
Check the information and if okay, left-click ‘Next’. The next screen is an instruction to close this specific window tab (not the browser).
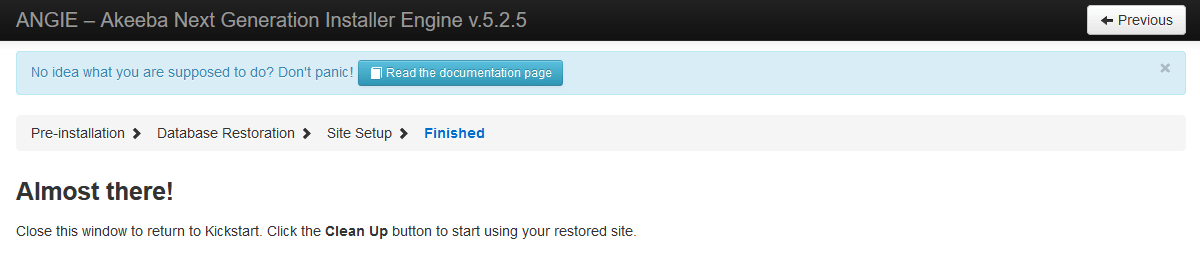
Do this and you will be returned to the original kickstart.php launch window.
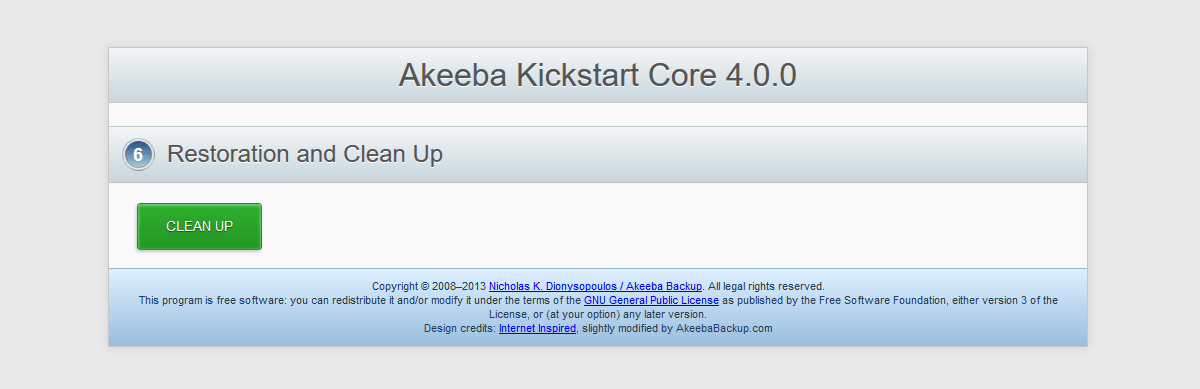
Left-click the Clean Up files button. This removes the Akeeba archive, kickstart.php and en-GB.kickstart files you uploaded. This is necessary to prevent someone visiting your site and running the restore process again. Once completed you will see the following screen.
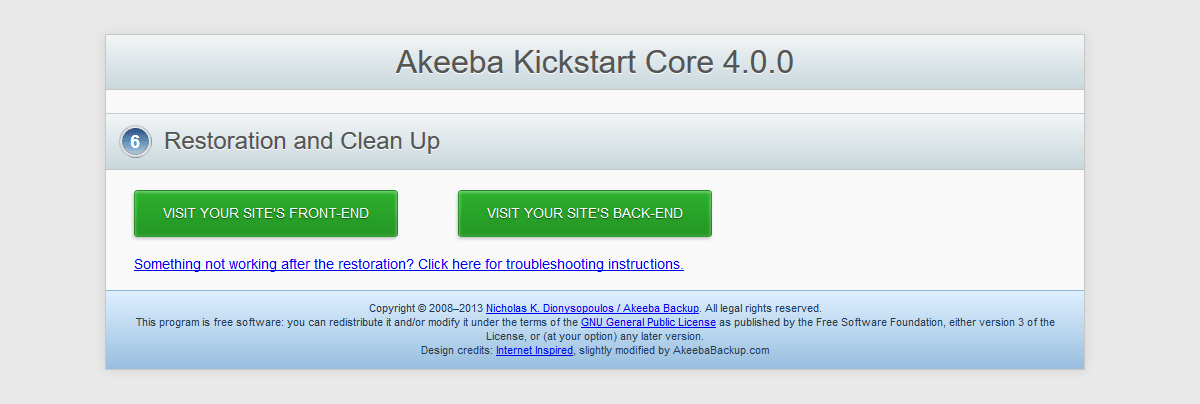
Left-click the 'Visit Your Site’s Frontend' button to test the restore. Providing everything has gone smoothly, you should see your website displayed.
This ends the two part tutorial: Joomla Website Akeeba Restore