This tutorial will show you how to add responsive light-box style galleries with touch screen support to your Joomla articles using Simple Image Gallery.
How to Install Simple Image Gallery
The plugin can be installed from the Joomla v3 administrator system by opening Extensions/ Manage/ Install, selecting the Web option and searching for 'joomlaworks'. Click the Simple Image Gallery extension name when it shows in the search results then the Install button.
1. Prepare your images
While Simple Image Gallery will display images at the configured sizes, irrespective of the actual dimensions of the image file, it is good practise to resize large images before uploading to a website. Large image files use up valuable hosting space and can make a website perform poorly causing frustrated visitors to leave.
There are several free software solutions to manage resizing images. A popular solution is GIMP which is free to download and use and has installers for Windows, OSX and Linux. You can visit the GIMP website by clicking this link: GIMP Image Editor. Please note Vision Design Services accepts to liability for your choice to download and install GIMP.
Image files should have dimensions of no more than 1024 pixels in height or width. So for example a portrait image may have a height of 1024px while a landscape image would have a width of 1024px. You can create larger images but these will have larger file sizes and use up more of your hosting space.
The image should also be saved at no more than 60%-75% quality since this will substantially reduce file sizes. Ideally, you are looking for an image file size of no more than 65Kb for a busy image with lots of detail and a file size of no more than 25Kb for an image with less detail.
The last thing you need to do is ensure your images have meaningful names. For example if you have a picture of a cat, it is better to have 'Image-of-a-cat' as the image name rather than 'img0001' which is the sort of name applied by digital cameras.
The image name is displayed in the light-box which is shown when a thumbnail in the gallery is clicked. The name also helps the image during listing in search engine results which then supports your website search engine performance.
2. Create a Folder & Upload the Images
The next stage is to create the folder for the new gallery and upload the prepared images to this.
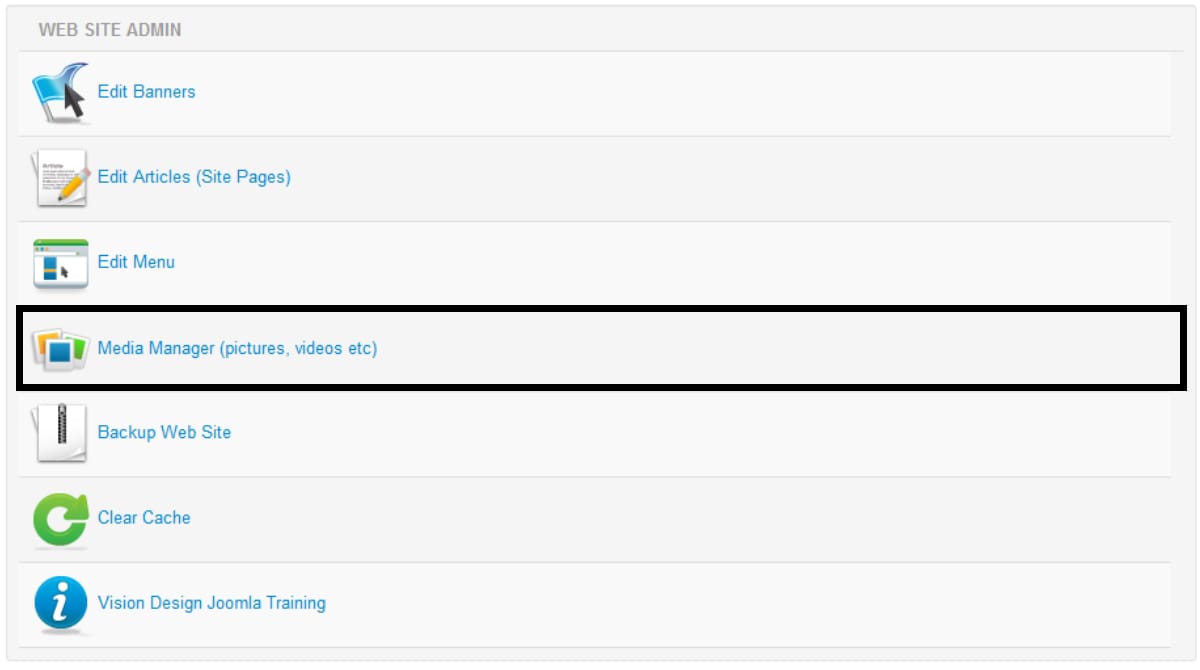
Login to the Joomla administrator system and select Media Library from the central menu, as shown in the image below.
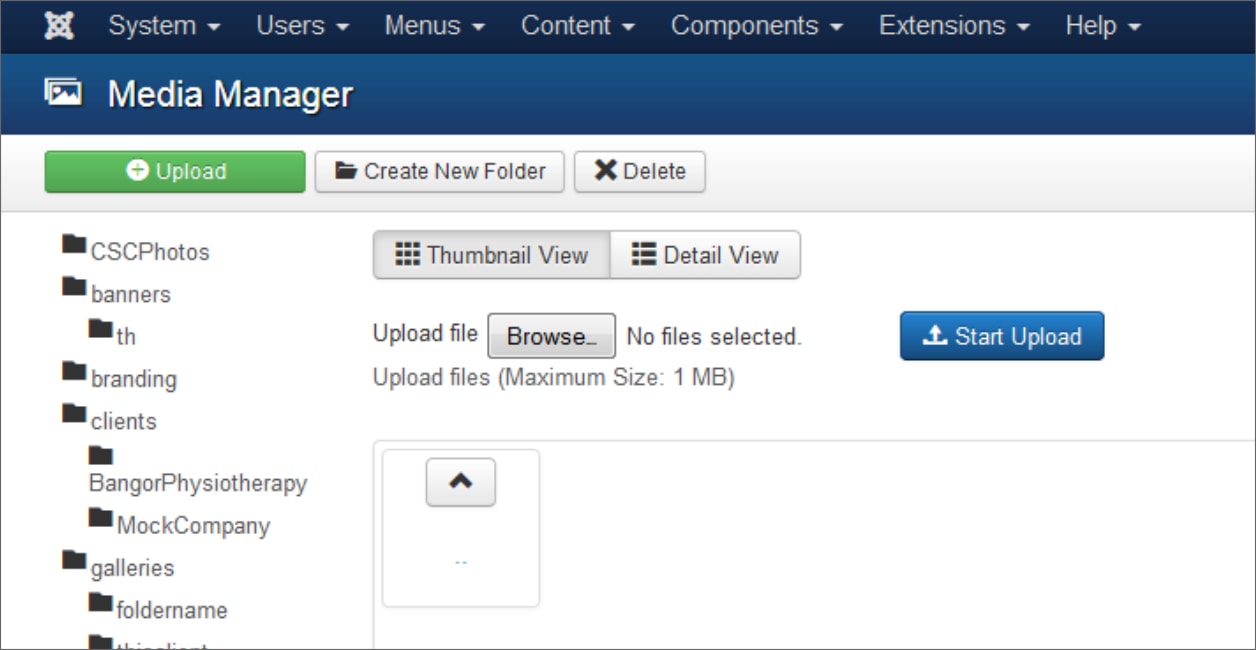
When you access the Media Manager, the following window will be displayed.
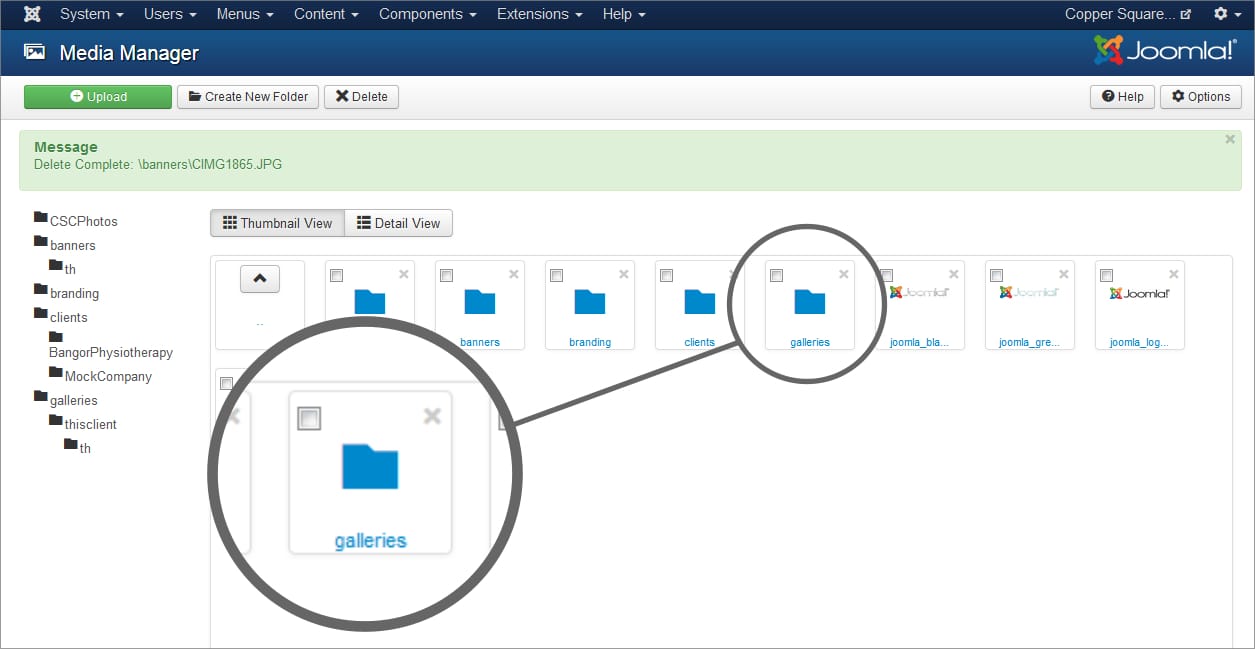
The name assigned to the folder for your galleries will be confirmed, however, in this example it is named 'galleries'. Left-click the specified folder to view the current gallery folders.
Left-click the Create New Folder button top of the window and the following dialogue will appear above the folders.
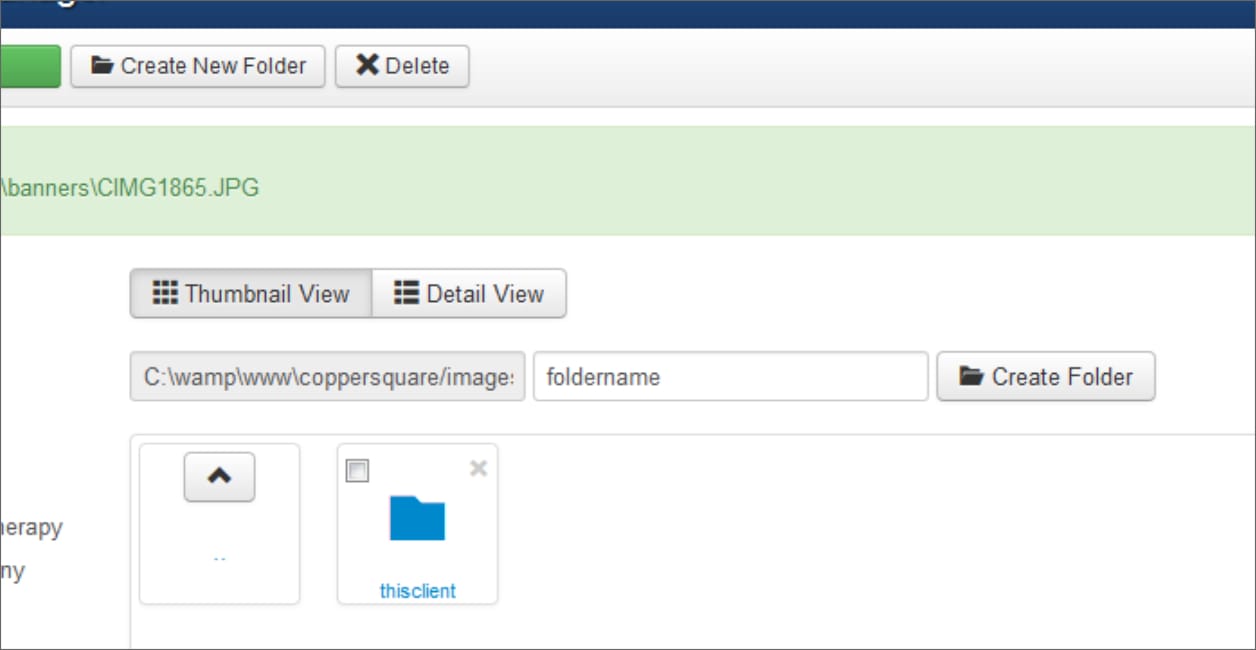
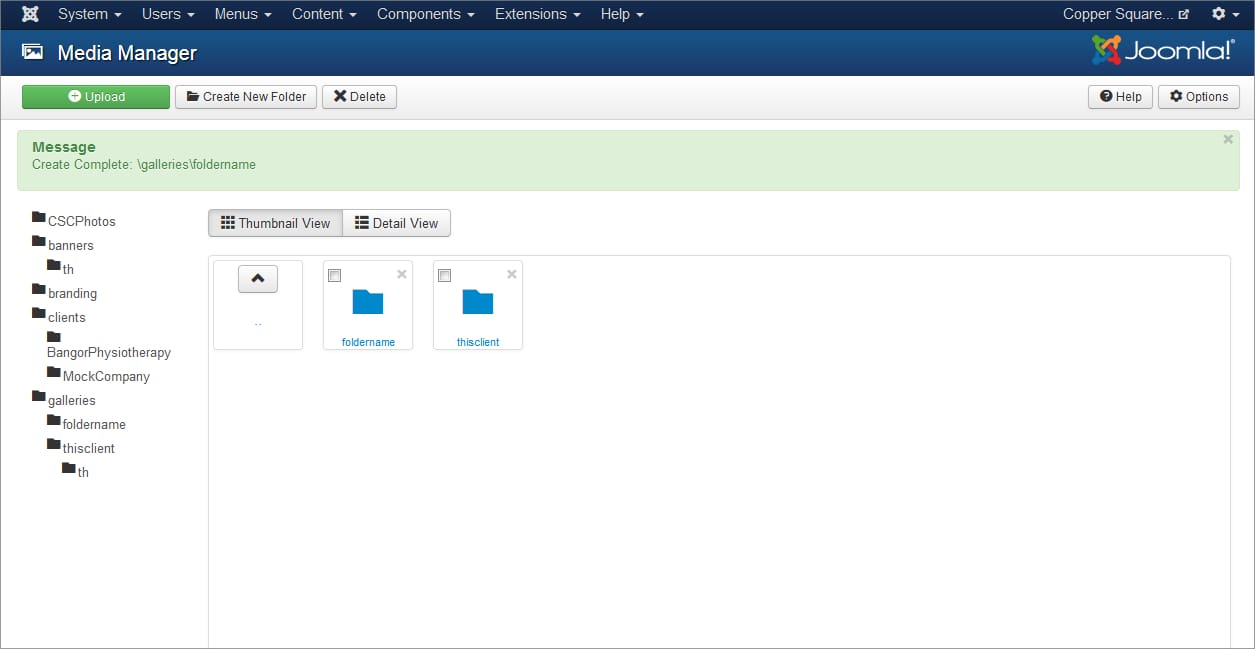
Enter a meaningful name for the new folder, up to 15 characters in length with no spaces then left-click the Create Folder button. Your new folder will be created as in the example below.
Left-click the new folder to open it. With the new folder open, left-click the green Upload button, top-left of the window to reveal the upload prompt.
Left-click the Browse button. This will open your operating system’s standard file system.
Use this to navigate to the folder where the required images are stored. Access the folder and select all the images you want to upload.
Note: Hold the Ctrl (Cmd on Mac) button down while clicking on all the needed images. They should be highlighted as you select them.
When all the images have been selected, release the Ctrl /Cmd button and left-click Open, bottom right of the window. This will return you to the Joomla Media Manager, however, there should now be ‘x’ files selected next to the Browse button where ‘x’ should reflect the number of files you selected.
Left-click the blue Start-Upload button to upload the files to the folder. When the upload is complete, the screen will refresh to show the images in your folder as in the example below.
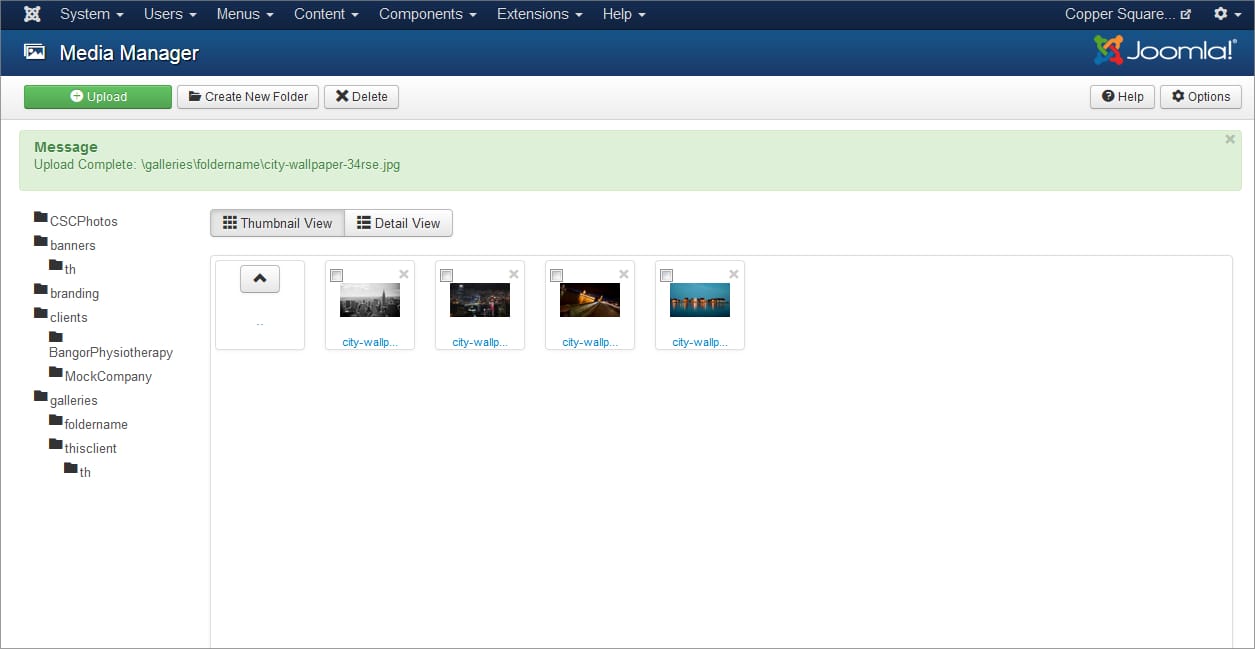
Make a note of the folder name as you will need this to insert the gallery.
You can now exit the Media Manager by clicking the icon top-left of the Joomla administrator window.
![]()
3. Inserting the gallery into an article (Joomla content page)
Access the Article Manager by selecting the Edit Articles (Site Pages) option in the Web Site Admin panel.

Open (left-click the title) the article in which you want to place the gallery as in the following example.
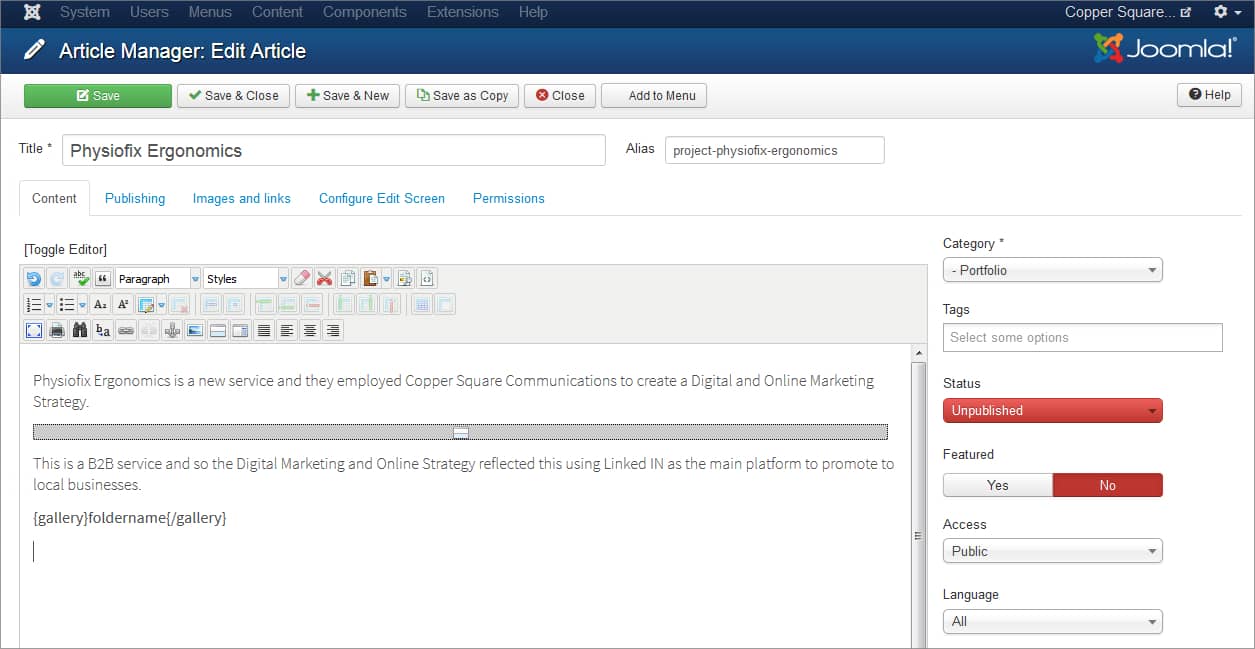
Use your mouse to click in the location you want to place the gallery then add the following snippet replacing foldername with the name of your folder. Multiple galleries can be added to an article.
{gallery}foldername{/gallery}
Save your article and check everything is working as expected when it is viewed on the website.
Updating Galleries:
To update a gallery simply prepare and upload any new images to the correct gallery folder. Images can be deleted by left-clicking the red ‘X’ top-right of the image thumbnail.
The Simple Image Gallery plug-in will automatically update the gallery within the article.
This ends the tutorial: Adding Images Using Simple Image Gallery.